In the last tutorial we set up our server side Swift project to connect with the MySQL database we set up here. In this tutorial, we’re going to learn how to run queries against our database using Swift & the Perfect framework.
Writing our First Statement
In the last tutorial we created a new Database.swift file that will handle all of the related database functionality of our project. What we’re going to do is add in another function to this file that will allow us to insert a new row into the game table of our database.
To do so, I’m going to add in a function called insertGame which looks like this…
This file contains bidirectional Unicode text that may be interpreted or compiled differently than what appears below. To review, open the file in an editor that reveals hidden Unicode characters.
Learn more about bidirectional Unicode characters
Awesome, so now that we have our first function created that will insert a game into our database, let’s call this from our main.swift file. Here’s what we’re going to do:
Create an instance of our DB class (inside of our Database.swift file) that will allow us to make calls to the public functions we’ve put inside of this class.
Call our insertGame function!
Here’s what my main.swift file looks like now…
This file contains bidirectional Unicode text that may be interpreted or compiled differently than what appears below. To review, open the file in an editor that reveals hidden Unicode characters.
Learn more about bidirectional Unicode characters
Now when we go ahead and run our application, our insertGame function will execute which will insert a new row into the game table of our database.
I’ve gone ahead and performed a quick query of the database just to show the additional row that has been added.
Great, so we’ve written our first SQL statement that will insert game rows into our database using Swift! As promised, I’ll be keeping these tutorials as short as possible, so I’ll end this one right here. If you’re interested in learning writing server side Swift, in the next tutorial I’ll be showing you how to write your first API.
If you’re having some trouble getting your project to this stage, leave a comment below and I’ll help you out. Have any other unrelated questions or suggestions? I’d like to hear those too!
Howdy folks! In the last tutorial we spent some time going through how we can take the JSON data we retrieved from our GET request in Swift and display it inside of a UITableView. We also learned how we can map the JSON representation of our Game object (from the database) into a Swift object so that we could easily access particular fields.
If you’re new to these tutorials, the API’s we will be calling to test our HTTP requests were developed in previous lessons using Spring Boot. If you’re interested in Java development and wanted to create your own backend application, the beginning of these tutorials can be found here. However, if you have no interest in learning how to create your own API’s, you can still follow along with this tutorial.
In this tutorial we’re going to code our POST request so that a user will be able to create comments on a Game. We’ll add this code to our Request.swift file which is responsible for all of our HTTP functionalities.
Creating our Comment.swift Object
Because we’re going to be using a JSON content type when posting to our API, that means we need to pass through a JSON representation of a Comment object. With that being said, the first thing we’re going to do is create a new Comment.swift file that mocks the fields of our comment table in the database. It will look something like this…
This file contains bidirectional Unicode text that may be interpreted or compiled differently than what appears below. To review, open the file in an editor that reveals hidden Unicode characters.
Learn more about bidirectional Unicode characters
Great, so we have our Comment.swift object created, now we’re ready to start coding our POST request. If you’ve been following along, we’re going to put this function in our Request.swift file which is responsible for all of our HTTP functionality. In order to make a POST request, we need to keep in mind that we’re going to be posting JSON content type to the server, which is where we can make use of our mapToDictionary function created in our Comment.swift file.
With that being said, our POST request will look as follows…
This file contains bidirectional Unicode text that may be interpreted or compiled differently than what appears below. To review, open the file in an editor that reveals hidden Unicode characters.
Learn more about bidirectional Unicode characters
We’ll take in a POST url which contains the API that we will POST to. We’ll also take in a body:[String: AnyObject] parameter which represents a JSON representation of, in this case, our Comment.swift object.
Testing our POST request
Sweet, so we’ve created our Comment.swift class and now we have our POST request set up using Swift 3. Now, let’s see how we can actually use this function.
First, let’s set up a new constant in our Constants.swift file to store our create game comment API. It should now look something like…
This file contains bidirectional Unicode text that may be interpreted or compiled differently than what appears below. To review, open the file in an editor that reveals hidden Unicode characters.
Learn more about bidirectional Unicode characters
For now, I’m going to create a new view controller in which I’ll name CommentViewController.swift which will be responsible for showing all of the comments of a particular game.
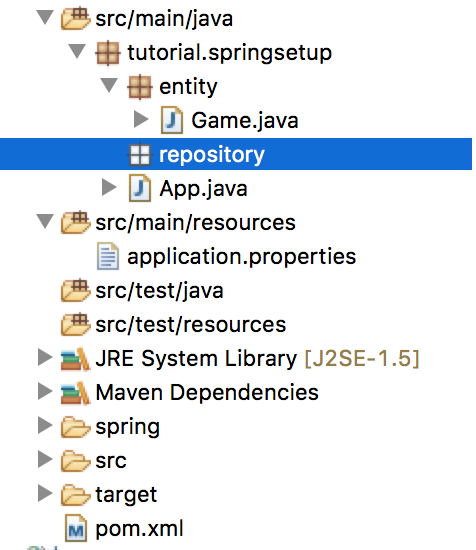
Now, my project directory will look something like this…
For testing purposes, I’m just going to create a dummy call with this function so that we can see how to call it and that it is working as we expect it to. With that being said, in our viewDidLoad method of our new CommentViewController.swift file, I’m going to add in the following code…
This file contains bidirectional Unicode text that may be interpreted or compiled differently than what appears below. To review, open the file in an editor that reveals hidden Unicode characters.
Learn more about bidirectional Unicode characters
Set up our POST url to create a comment on game with id = 1
We’ll call our Request.post method.
For now, I’ll set this CommentViewController.swift class as my initial view controller, just for testing purposes. When I run my application, I print out the data to the console which looks as follows…
Awesome, this tells us that our POST request is working as expected and that comments are being created on the game corresponding to the game.id we pass through in our API call.
So, we’ve created our Comment.swift object, wrote our POST request in Swift, and finally we have done a quick test to see that it is working as expected.
This tutorial was primarily created to develop our actual POST request, however, in the next tutorial we’ll set up a basic UI that will allow a user to comment on a particular game, and from this input we will POST it to the server.
Have any questions, comments, suggestions? Having issues getting your project to this stage? Leave a comment and I’ll be happy to get back to you.
Alright folks, in the past tutorials we spent some time writing our simple backend with Spring Boot (this will contain the API’s we will be calling in our iOS application) and the source code can be found here if you haven’t been following along. More recently, we set up a very basic XCode project where we enabled App Transport Security Settings so that we can make HTTP requests within our iOS application – the steps for this can be found here if you have yet to give it a shot.
In this tutorial we will be (finally) writing some code that will allow us to make GET requests to the API’s we wrote in our Spring Boot backend.
If you have no interest in learning how to write a backend and will not be running the Spring Boot application we have been developing throughout, don’t worry, you will be able to follow this tutorial for a basic understanding of how to make HTTP requests with Swift.
Coding our GET Request
If you haven’t already, open up your XCode project. We’re going to create a new Swift file, I’m going to name mine Request and this is where I’ll be holding all of my HTTP request related functionality. After doing so, my project directory looks as follows…
Open up the new Request.swift file you have just created. We’re going to add in the following code which will allow us to make a GET Request.
import Foundation
struct Request {
typealias CompletionHandler = ([[String: AnyObject]]) -> ()
staticfunc get(requestUrl: String, completionHandler: @escaping (CompletionHandler)){
let url = URL(string: requestUrl)!
let request = URLRequest(url: url)
// Asynchronous
let task = URLSession.shared.dataTask(with: request asURLRequest) { data, response, error in
guard error == nilelse {
print(error ?? "Error sending get request.")
return
}
guardlet data = data else {
print("Data is empty")
return
}
let json = try? JSONSerialization.jsonObject(with: data, options: [])
iflet jsonData = json as? [[String: AnyObject]] {
completionHandler(jsonData) // once the call has completed, we can escape with our CompletionHandler
// and return the data.
}
}
task.resume()
}
}
This might look a little bit confusing at first, but if we work through it a little bit more you’ll get a better idea of what is going on.
The requestUrl method parameter will be the URL we will call to retrieve data. If we look at our Spring Boot application and the APIs we have created, we would pass through a URL such as http://localhost:8080/api/games/1/comments to GET all comments posted for a particular game.
The completionHandler method parameter is used to return the results from our GET request. Since this HTTP request is executed asynchronously (to avoid blocking up the main thread), we want to be sure that we wait for this call to finish before returning the data, shown as completionHandler(jsonData) in the code.
If you’re still a bit confused about any part of this (I know the asynchronous call can be a little hard to grasp) add in a comment below and I’ll be happy to help.
Calling our GET Request Method
Fantastic, we have finally set up and written some code so that we can make calls to our API. Before we begin making use of this function, I’d like to set up another Swift file that will be used to store some constants (ex: our URLs) so that we can keep things a little more readable.
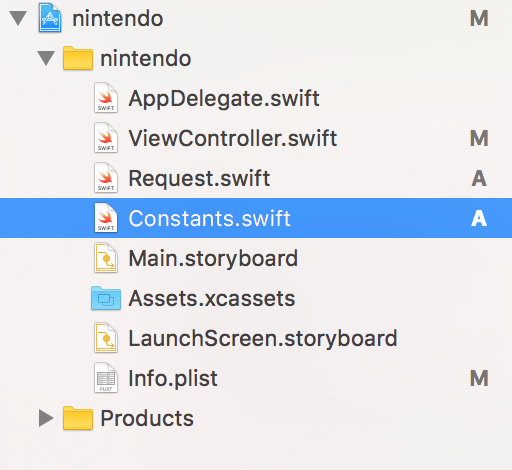
I’ve created a new Swift file called Constants which I’m going to use throughout to store any constant value that is going to be used in our application. This can range from a variety of things such as colours, String values, etc. My directory now looks as follows…
And the contents of my Constants.swift file looks something like this…
The more APIs we develop, the more constants we can add into this file. This is a really nice way of keeping everything a little more neat and if we make any changes to a particular constant we only have to worry about updating it in this file.
Alright, now we’re ready to test out our GET request function. Since I’ve only added in the searchGamesByTitle URL into our Constants.swift (for now), we might as well give that one a try.
Open up the default ViewController that was made upon creating your XCode project and add in the following code…
import UIKit
class ViewController: UIViewController {
overridefunc viewDidLoad() {
super.viewDidLoad()
// Call our get request function. We're going to search for games with a title like "mario"
Request.get(requestUrl: Constants.URL.searchGamesByTitle + "mario") { (results) in
print(results)
}
}
overridefunc didReceiveMemoryWarning() {
super.didReceiveMemoryWarning()
// Dispose of any resources that can be recreated.
}
}
We’re not going to do anything too exciting with our result data, for now we just want to test to see that we’re getting the output that we expect. If we build and run our project (press the play button on the top menu bar), our Request.get function will be called. Since we’re just printing out our results, you’ll notice in the console of XCode that you should have a JSON representation of the data we expect. It might look something like…
Awesome. Our function is working as we had hoped and this is where I’ll wrap up this tutorial. If you’re feeling a bit lost or if you are unable to get something similar running on your machine, comment below and I can help you out.
Next tutorial we’re going to be doing something a little more exciting. I’ll show you how to store this data we retrieve into an object and how we can display this data onto a UITableViewController.
Alright people, so we’re almost getting ready to begin developing a basic iOS application that will aim to consume the APIs we’ve been working on. Before doing so, I wanted to add a little more functionality to the (Spring Boot) backend that we have developed so far. This part of the tutorial I’ll go through pretty quickly as we already have a basic idea of how to develop an API. If you haven’t followed any of the other tutorials, not to worry, I’ve put the updated source code on github which can be found here.
If you’ve completely forgotten some of the steps we’ve taken to setting up our first API, here is the general flow that I like to follow
If I need to create a new table in the database, I’ll start by creating my Java object that will be mapped into my relational database, ex: our Game.java class.
If necessary I’ll create (or add to) my repository which represents the Java object that is mapped to the database, ex: our GameRepository.java interface. This is where I would start writing my @Query methods.
I will create (or add to) my existing @Service class that is used to add additional logic to the repository interface, ex: our GameService.java class.
If I’m feeling super eager, I’ll write a unit test to check that my service methods are performing as I expect.
And finally, I will create or add to an existing @RestController class so that my new service methods are accessible through an API, ex: our GameController.java class.
With that in mind, these are the steps that I will follow through in this tutorial. If you’re just here for the source code, I’ll add it to the end of this post.
Step 1: Creating A new Table
I’m going to create a new table that will allow users to create comments on a particular game if they wish. To do so, I’ve set up the following Java object inside of our entity package…
package tutorial.springsetup.entity;
import java.util.Date;
import javax.persistence.Column;
import javax.persistence.Entity;
import javax.persistence.GeneratedValue;
import javax.persistence.GenerationType;
import javax.persistence.Id;
import javax.persistence.ManyToOne;
import javax.persistence.Table;
@Table(name = "comment")
@Entity
publicclass Comment {
@Id
@GeneratedValue(strategy = GenerationType.AUTO)
private Long id;
@ManyToOne // One game will have many comments
private Game game;
// Authors name
@Column(name = "author")
private String author;
// Comment text
@Column(name = "text")
private String text;
// Date the comment was created
@Column(name = "created_date", nullable = false)
private Date createdDate;
public Comment(){
createdDate = new Date(); // set the date to today's date when create
}
public Long getId() {
return id;
}
publicvoid setId(Long id) {
this.id = id;
}
public Game getGame() {
return game;
}
publicvoid setGame(Game game) {
this.game = game;
}
public String getAuthor() {
return author;
}
publicvoid setAuthor(String author) {
this.author = author;
}
public String getText() {
return text;
}
publicvoid setText(String text) {
this.text = text;
}
public Date getCreatedDate() {
return createdDate;
}
publicvoid setCreatedDate(Date createdDate) {
this.createdDate = createdDate;
}}
Great, so that is what our basic comment table will look like. Once you run your application this table will be created and you’ll be able to view it in your local MySQL database.
Step 2: Creating the CommentRepository interface
Now that we have our new table, the next step is to create our repository interface so that we can write some basic queries. The first query I would like to add will allow for users to be able to find all comments created on a particular game. I’m going to create a brand new repository called CommentRepository inside of our repository package. It’s going to look like this…
package tutorial.springsetup.repository;
import java.util.List;
import org.springframework.data.jpa.repository.JpaRepository;
import org.springframework.data.jpa.repository.Query;
import tutorial.springsetup.entity.Comment;
publicinterface CommentRepository extends JpaRepository<Comment, Long>{
@Query("SELECT c FROM Comment c WHERE c.game.id = ?1")
public List<Comment> findCommentsByGameId(Long gameId);
}
As you can see, I’ve extended the JpaRepository interface so that we can take advantage of some of the provided operations. This is similar to what we have done in our GameRepository interface.
Step 3: Creating our GameService class
Now that we have our CommentRepository setup, we can begin setting up our CommentService. Not only do I want to provide some additional logic to the findCommentsByGameId(Long gameId) we had just created, but I also want to add in a new method that will allow for users to CREATE new comments (this is where we’ll take advantage of JpaRepository). I’ve made a new class within our service package and named it CommentService which looks as follows…
package tutorial.springsetup.service;
import java.util.List;
import org.springframework.beans.factory.annotation.Autowired;
import org.springframework.stereotype.Service;
import tutorial.springsetup.entity.Comment;
import tutorial.springsetup.repository.CommentRepository;
@Service
publicclass CommentService {
@Autowired
private CommentRepository commentRepo;
@Autowired
private GameRepository gameRepo;
public List<Comment> findCommentsByGameId(Long gameId) throws Exception{
if(gameId == null){
thrownew Exception("Invalid game id.");
}
List<Comment> results = commentRepo.findCommentsByGameId(gameId);
return results;
}
public Comment createGameComment(Comment comment, Long gameId) throws Exception{
if(comment == null || gameId == null){
thrownew Exception("Invalid parameters.");
}
Game game = gameRepo.findOne(gameId);
if(game == null){
throw new Exception("Cannot find game with id=" + gameId);
}
comment.setGame(game); // Find game by provided gameId and set it
Comment created = commentRepo.save(comment); // "save" is provided by the extended JpaRepository interface
return created;
}
}
Step 4: Writing Unit Tests
To avoid boring you to death, I’ll skip over going through the unit testing portion. If you’re really interested they’ll be available to look at in the source code inside of the CommentServiceTests.java class.
Step 5: Creating The CommentController class
Now that we have added some additional functionality to our CommentService class, we can finally start creating a couple of new API’s. We will want to develop a GET request that will allow for client side users to read the comments that were made on a particular game, and we also want to develop a POST request that will allow for users to create new comments. I’ve created a new class within our controller package and named it CommentController which looks as follows…
Great, so now that we’ve added in our two new APIs we can run our application and test them. Once again, I’ll be using Restlet Client and after calling each API I am able to retrieve the following responses…
Super! We’ve sped through adding in some brand new functionality to our app. If you’re feeling a bit lost, check out some of the previous tutorials or create a comment below. I’ve also added the updated source code from this tutorial to github and it can be found here.
Have any questions, comments, suggestions? Having issues getting your project to this stage? Leave a comment and I’ll be happy to get back to you.
Last tutorial we developed a basic understanding of what the service layer is comprised of by adding a couple of simple methods that took advantage of our GameRepository interface we created prior. If you have negative interest in going through any of the previous steps and you’re just interested in creating a damn API, check out the updated source code on github and import it into your favourite IDE (I’m using Eclipse).
This tutorial we’ll be using the methods we created in our GameService class to begin the development of our first REST controller. I’ll also show you how we can test and call the API’s we develop from our browser which is where all the excitement begins (kind of).
Creating The GameController Class
Alright, like we’ve done so many times in the past we’re going to create a brand new package. This time we’ll name it “controller” which will hold all of the Java classes related to our API functionality.
Right click tutorial.springsetup
New > Other and type “package” to filter
Name this one “controller”
Now that we’ve created our new package, we’re going to create a new Java class within it – I’ve called mine GameController which will be responsible for anything related to our Game entity.
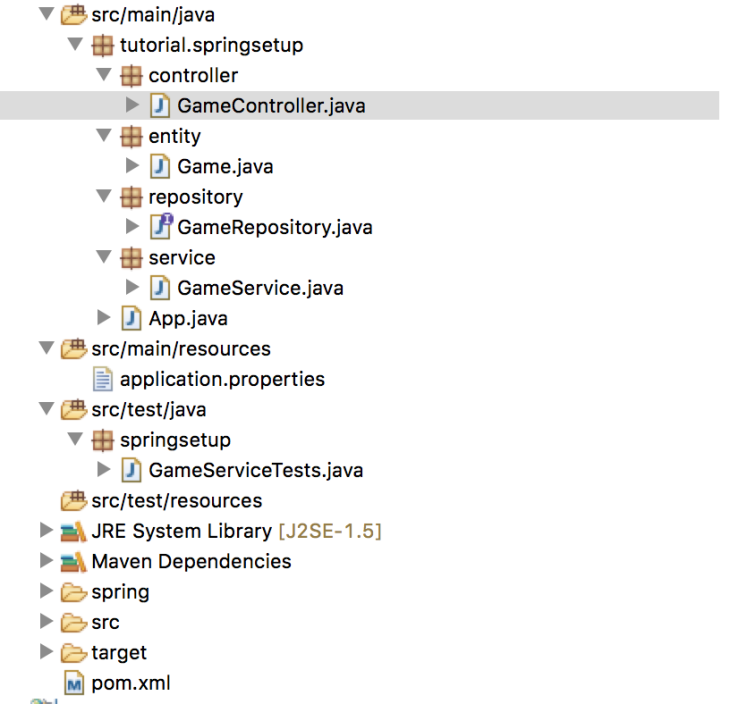
Your project directory should now look something like…
We’re going to annotate our new GameController class with @RestController – this was added in Spring 4 which has made the development of RESTful web services in Spring pretty convenient.
Creating Our First GET Request
The first API we’re going to create will make use of our searchGamesByTitle(String title) method we created in our GameService class. We want a user to input a title of a game they are searching for, and from this input we’re going to send back a response which will be composed of a list of Game objects that were found. Here’s how it’s going to look…
package tutorial.springsetup.controller;
import java.util.List;
import org.springframework.beans.factory.annotation.Autowired;
import org.springframework.web.bind.annotation.RequestMapping;
import org.springframework.web.bind.annotation.RequestMethod;
import org.springframework.web.bind.annotation.RequestParam;
import org.springframework.web.bind.annotation.RestController;
import tutorial.springsetup.entity.Game;
import tutorial.springsetup.service.GameService;
@RestController
publicclass GameController {
@Autowired
private GameService gameService;
// An example of how this API would be called in browser might be something like: localhost:8080/api/games?title=mario
@RequestMapping(value = "/api/games", method = RequestMethod.GET)
public List<Game> searchGamesByTitle(@RequestParam(value = "title", required = true) String title){
List<Game> results = gameService.searchGamesByTitle(title);
return results;
}
}
You might be wondering what the hell is even going on, but if we break it down line by line it’s not so bad.
value = “api/games” defines the URI of our API. So this would get called in browser as localhost:8080/api/games
method = RequestMethod.GET marks this API as a GET request which means that we are intending to retrieve some data.
public List<Game> searchGamesByTitle(@RequestParam(value = “title”, required = true) String title)
public List<Game> is what we will be returning to the client side. The user is performing a GET request and they will be returned a List of Game objects in JSON (for example).
@RequestParam(value = “title”, required = true) String title) is what we REQUIRE in the URI in order to perform the request. By using @RequestParam we can append “?title=” onto the end of our URL. We can then take that value and use it to perform our searchGamesByTitle method from the GameService class. An example URL might look something like localhost:8080/api/games?title=mario where “mario” would be the input parameter value.
That is our first API created! Now that we have a GET request to retrieve data, let’s create a POST request that will insert data into the database.
Creating our First POST Request
For our POST request we’re going to use our insertGame(Game game) method in our service class. We expect that a user will input a Game object in which we insert into the database. Below our last method, I’ve added in the following…
@RequestMapping(value = "/api/games", method = RequestMethod.POST)
public Game createGame(@RequestBodyfinal Game game) throws Exception{
Game created = gameService.insertGame(game);
return created;
}
very similar to the previous API we created, this time we’re going to define it as a POST using RequestMethod.POST.
public Game createGame(@RequestBodyfinal Game game) throws Exception
we’re going to use the @RequestBody annotation which indicates that a Game object should be bound to the body of the HTTP request. In short, we expect that the user will send a Game object (such as a JSON representation) when calling this API.
When this call has been executed, we’re going to return the Game object that had just been created to the user.
Great, so we now have a simple GET and POST request that will communicate with our service methods we had created in the previous tutorial. Now let’s check to see that these API’s are performing as we expect them to.
Testing Our APIs
If you haven’t already started running your application…
Right click App.java (or whatever you have named your Main Application class)
Run As > Java Application (this will run on port 8080 unless you have changed your properties)
There are TONS of free tools you can find online to test your APIs, I like using postman or if you’re a Chrome browser kind of person you can find an add-on called Restlet Client which is super easy to use. I’ll be using the latter to demonstrate if you’d like to follow along.
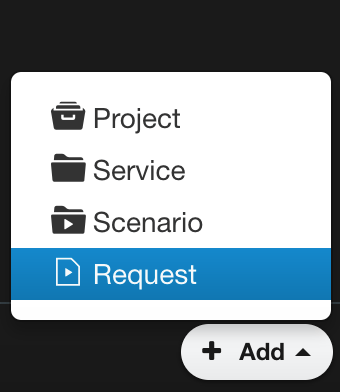
The first API we’re going to test is our GET request which will attempt to find games by provided input title. Let’s open up Restlet and create a new request (located in the bottom left corner).
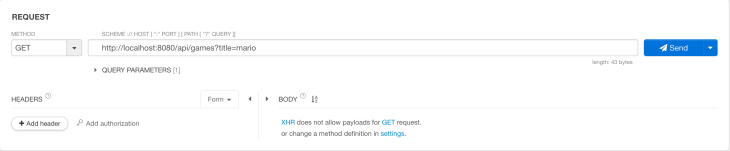
Give your Request a name and you’ll notice that a default GET request populates the right panel of your window. Don’t worry too much about anything else other than the URL field for now which I will fill in with the value of our first API request.
Mine looks like this…
And if we hit Send we should get a 200 response from our application as follows…
Wicked!!! It’s working as we expected and we’re getting a response with two Game objects represented in JSON. Assume we were calling this API through some kind of client side mobile or web application, we could then parse this JSON response and display it in some kind of really cool table or whatever your heart desires.
Now let’s test our POST request – this will be a little bit different. Create another Request in Restlet, and change the method to POST. You’ll notice that a larger Body field is created – this is where we will input our JSON representation of our Game.java object. Your window should look something like…
And if we represent the Game object in which we wish to create as JSON, you might do something such as
{
 "title": "Battletoads",
 "description": "Battletoads is a beat 'em up/platform video game developed by Rare.",
 "releaseDate": "1991-06-01"
}
which you can copy and paste into the Body field. Hit Send and you should receive a 200 response as follows…
Super! We now know that both of our API’s are working as we had intended them to and we are now able to search for games by their title as well as insert new games into the database.
What we’ve covered so far
Through this tutorial we’ve managed to create our first Rest Controller alongside a couple of API’s to perform some basic GET and POST requests. We’ve also taken advantage of some online tools so that we can test that our API’s are working as we expect them to.
If you ran into a couple of issues while trying to follow along or if you just want to import the source code to play around you can find it here.
Have any questions, comments, suggestions? Having issues getting your project to this stage? Leave a comment and I’ll be happy to get back to you.
Last tutorial we looked at setting up our GameRepository interface so that we could run queries against our database by using the @Query annotation. You can import the updated source code here and continue following along if you haven’t gone through any of the previous tutorials.
This time we’re going to take a look at creating our service layer which is responsible for the business logic of our application whereas a repository is used to accomplish operations related to our database tables. For large projects, adhering to this practice allows for easier maintainability of code especially when there are changing requirements.
Setting up the Service Class
Similar to what we’ve done in the past, we’re going to create another package and name it service which will hold all of our service classes.
Right click tutorial.springsetup
Select New > Other and type “package” to filter
Name this package service and hit Finish
We’re also going to create another class within this new package. I’m going to call mine GameService which will be responsible for handling anything related to our Game entity. Once you have created your service package and made a new class within this package, your project directory should look something like…
Cool, so we’ve created our first service class but before we create any methods we need to annotate this class with @Service (similar to @Entity in our Game class) which will allow for this class to be auto-detected via component scanning when we run this project (but don’t worry about this too much for now).
Remember our findGamesByTitle(String title) method we created last time inside of our GameRepository class? I want to add a little more logic to this by formatting the input title parameter before executing this method so I’m going to make a new method inside of our GameService class to do so. Here’s what my GameService class looks like now…
package tutorial.springsetup.service;
import java.util.List;
import org.springframework.beans.factory.annotation.Autowired;
import org.springframework.stereotype.Service;
import tutorial.springsetup.entity.Game;
import tutorial.springsetup.repository.GameRepository;
@Service
publicclass GameService {
@Autowired
private GameRepository gameRepo; // Autowire in our GameRepository to allow access to all public methods
public List<Game> searchGamesByTitle(String title){
String formattedTitle = "%" + title + "%"; // wrap '%' around the input title parameter
List<Game> results = gameRepo.findGamesByTitle(formattedTitle); // now perform our repository query
returnresults; // return results
}
}
As you can see we’ve created a new method inside of our GameService class called searchGamesByTitle which will take the value of title within the input parameter, wrap it with ‘%’ so that our query will find results that have a game title containing the value of title, and then we can call our GameRepository method to execute findGamesByTitle using our formattedTitle value. We could add some handling for the case where title is null but for simplicity I’ll leave it as is for now.
Super, we’ve added our first service method. Now we’re going to make another which will CREATE a new Game object and INSERT it into our database. This time we will take advantage of the operations provided by JpaRepository which we had extended in our GameRepository class.
Here’s what my insert method looks like (I’ve added it just below the previous one we had created)
public Game insertGame(Game game) throws Exception {
if(game == null){ // Check that our game is not null
thrownew Exception("Invalid input!");
}
Game insertedGame = gameRepo.save(game); // Save the game into the database and store the returned value
returninsertedGame; // return the inserted game
}
The insertGame method above will take a Game object as a parameter and attempt to insert it into the database. If game is null I do not want to insert it so instead I will throw an Exception. Otherwise, gameRepo.save(game) will execute where save is a method provided by JpaRepository which will insert our new object into the database.
Testing our Service Methods
Now that we have created a couple of methods inside of our GameService class, let’s see if they are working as expected. Open up the GameServiceTests class we created in the previous tutorial and we’ll add in the following test cases…
@Autowired
private GameService gameService; // Autowire in our GameService to access public methods
@Test
publicvoid testSearchGamesByTitle(){
List<Game> results = gameService.searchGamesByTitle("mario");
Assert.assertEquals(2,results.size());
}
@Test
publicvoid testInsertGame() throws Exception{
// Create new game object that we want to insert.
Game game = new Game();
game.setTitle("The Legend of Zelda: A Link to the Past");
game.setDescription("Action-adventure video game developed and published by Nintendo.");
Game created = gameService.insertGame(game);
Assert.assertNotNull(created.getId());
}
Now that we have a couple of new test cases set up…
Right click GameServiceTests in the project directory
Run As > JUnit Test
And if your tests pass, you should see the following
Cool! We now know that our methods are working as we expected.
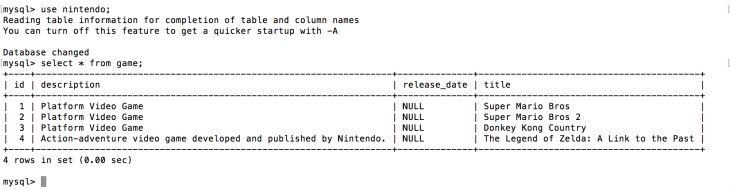
And if we’re really curious, we can open up Terminal and use the MySQL command line tool to execute a quick SELECT statement to double check that our game object is being saved as we expect it to.
And we can see our new game that has been inserted as the last row in the table.
What we have completed so far
So far in this tutorial we have developed a basic understanding of what a service layer will contain. We’ve gone through adding a little more logic to our GameRepository method we created in the last tutorial and we’ve taken advantage of the save method extended from JpaRepository so that we can INSERT new rows into the database.
Next tutorial we’re going to be creating our GameController which will act as an additional layer to our project and we’ll go through creating our first API. This is just so exciting.
If you were having a little trouble following along or if you prefer to import the project, I’ve put the updated source code on github which can be found here.
Have any questions, comments, suggestions? Having issues getting your project to this stage? Leave a comment and I’ll be happy to get back to you.
Last tutorial we managed to configure our Hibernate and database properties within our application to allow for us to create tables using Java objects annotated with @Entity and @Table. In this tutorial we will be learning how to create simple queries within our application that we can run against our database.
Setting up the Game Repository
In our last tutorial we created a table using the Game.java class. In order to run queries against our game table, we need to create a repository class. For every entity class in Java, you will need to create a repository class which will allow for you to perform simple queries.
Remember in the last tutorial how we created a package and named it entity? We’re going to do something similar here, but instead we’re going to call it repository. This package will be responsible for holding all of your repository classes.
Right click the tutorial.springsetup package
Select New > Other and type “package” to filter
Name your package “repository” and hit Finish
Your project directory will now look something like this…
With your new package selected, once again right click it and create a new interface called GameRepository. Once this interface has been created (and it is inside of your repository package), add in the following code…
We’re going to extend JpaRepository so that we can make use of the generic CRUD operations that are provided through this interface. Might as well take advantage of existing operations and if you’re interested, all of them can be found here.
So we have our repository class set up, now we can start writing some queries. The first query that I want to write will perform a search for game by it’s title. To do so, I will use the following code…
@Query("SELECT g FROM Game g WHERE lower(g.title) LIKE lower(?1)")
public List<Game> findGamesByTitle(String title);
What is going on here? The first line which is annotated with @Query is responsible for the query that is going to be executed when this method is called. This might look a little different from your typical SQL as we are using our Java Game object within the statement. Basically, we are going to select every game where the lowercase title of the game is LIKE the String title parameter we are passing through in the second line of code.
I guess if we break it down we can kind of think of it like this
findGamesByTitle(“mario”);
@Query(“SELECT g FROM Game g WHERE lower(g.title) LIKE lower(“mario”))
return a List of Game objects that were found when performing the query above
Testing our First Query
Awesome, so we have written our first query that will attempt to find games by their title. How do we know this is working? Let’s write a quick unit test to check that we have it set up correctly and so that you can get a better idea of how to call these methods.
Right click on the src/test/java package
Select New > Other and create a new class. I’ve named mine GameServiceTests
This class will be used to test all of your Game related functionality (sure it will).
Now your project directory might look as follows…
Open the GameServiceTests class you have just created and type in the following…
import org.junit.Assert;
import org.junit.Test;
import org.junit.runner.RunWith;
import org.springframework.beans.factory.annotation.Autowired;
import org.springframework.boot.test.context.SpringBootTest;
import org.springframework.test.context.junit4.SpringRunner;
import tutorial.springsetup.App;
import tutorial.springsetup.entity.Game;
import tutorial.springsetup.repository.GameRepository;
@RunWith(SpringRunner.class)
@SpringBootTest(classes = App.class) // App.class is the name of my main application class, if yours is different you might have to change this.
publicclass GameServiceTests {
@Autowired
private GameRepository gameRepo; // By autowiring in our game repository, we will have access to all of it's public methods
@Test
publicvoid testFindGameByTitle(){
List<Game> results = gameRepo.findGamesByTitle("%mario%"); // We want to find all games with a title like "mario"
Assert.assertEquals(2, results.size());
}
}
This is our first unit test which aims to test the query we had created in the previous step. We want to see if we can find all games with a title like “mario” and check that we are getting the expected results (in this case, we are expecting to find two games). If we run this test now, it’s going to fail because we have not yet put any data into our database. Because we have yet to create any methods that will INSERT rows into our game table, for demonstration purposes we’re going to quickly add a few rows into our table from our Terminal window.
Open up a Terminal window
mysql -u root -p and enter your password. This should allow you to use the MySQL command line tool
USE nintendo; so that all of our SQL statements will run against the nintendo database
Now we can start inserting a few rows for testing purposes. Copy and paste the following statements below into your terminal window so that we have some data to test with.
INSERT INTO game(id, title, description) VALUES(1, 'Super Mario Bros', 'Platform Video Game');
INSERT INTO game(id, title, description) VALUES(2, 'Super Mario Bros 2', 'Platform Video Game');
INSERT INTO game(id, title, description) VALUES(3, 'Donkey Kong Country', 'Platform Video Game');
Your window might look something like…
So now we have three rows of data in our game table, let’s run our unit test we wrote earlier to see if our query is working as expected.
Right click on GameServiceTests.java
Select Run As > JUnit Test
This will run your application and execute the unit test which will appear in the left panel. If it works as expected, you should see the following
Green is good. This tell us that we have found two games in our table that have titles LIKE “mario” which is exactly the output we expect.
What we have covered so far
Cool, so if you have followed from the beginning we have managed to set up our database, create our Spring Boot and Hibernate environment, configure our project to communicate with our database, write queries within our project that will run against our database and test that they are working as expected. I hope you’ve been able to follow along without too many issues but let me know in the comments below if you’re totally lost.
In the next tutorial I will show you how to create our Service layer where we will be able to create new game entries (INSERT into) from our application as well as update/modify existing data. This is where we can take advantage of the JpaRepository we had extended in our GameRepository class.
Oh yeah, and if you’d prefer to just import the source code you can find the updated files here.
Have any questions, comments, suggestions? Having issues getting your project to this stage? Leave a comment and I’ll be happy to get back to you.
Otherwise, if you prefer written format… keep on scrolling!
Last tutorial we looked at setting up our Spring Boot and Hibernate environment by adding dependencies to our pom.xml file. If you have yet to follow that tutorial, you can find it here or you can download and import the source code from https://github.com/dnaismyth/springbootskeleton which contains our basic project setup.
In this tutorial, we will be working through to set up communication between our Spring Boot project and our database. This is where Hibernate comes into play and we will use it to map a simple object-oriented domain written in Java to a relational database.
Setting up Our Main Application Class
In order to run our project, we need to set up our main class which is the single entry point of our application and is responsible for invoking all subsequent methods. Don’t worry, Spring Boot makes this pretty easy.
Inside of my src/main/java directory, I’ve created another package called tutorial.springsetup which is our default package.
Right click on your src/main/java directory
Select New > Other
Type “package” to filter and then select next
Enter a name for your package and select
Now that we have our default package, right click on it and by following the similar steps as above we can create our main application class as follows…
Right click on the package you have just created
Select New > Other
Select Class and click next
You’ll be taken to a screen that looks similar to this…
Give your class a name. I’ve called mine App but if you prefer to use something different feel free to do so. Select Finish to create your new class. Your directory should now look something like…
Remember before when I said that Spring Boot makes this easy? With your new class created, add in the following code:
import org.springframework.boot.SpringApplication;
import org.springframework.boot.autoconfigure.SpringBootApplication;
import org.springframework.context.annotation.ComponentScan;
@ComponentScan
@SpringBootApplication
public class App {
publicstaticvoid main(String[] args) {
SpringApplication.run(App.class, args);
}
}
Great, we now have our main application class created.
Configuring our Application Properties to Communicate with our Database
In order to hook up our database with our project, we need to add in a few properties that provide the details of the database we had set up earlier.
Find src/main/resources in your project directory and do the following…
Right click src/main/resources
Select New > Other and type “file” to filter
Click Next and in the field where it says “File Name” type application.properties
Note that in this case, your file must be named application.properties
Your project directory should now look something like…
Open up your new application.properties file and add in the following properties
# If you didn't name your database "nintendo" use the name of your
# database that you had created in our first tutorial.
spring.datasource.url = jdbc:mysql://localhost:3306/nintendo
# Use your MySQL username
spring.datasource.username = root
# User your MySQL password
spring.datasource.password = adminspring.jpa.properties.hibernate.dialect = org.hibernate.dialect.MySQL5Dialect
spring.datasource.driver-class-name = com.mysql.jdbc.Driver
spring.jpa.hibernate.ddl-auto = update
spring.datasource.initialize = false# Port we will run our application on
server.port=8080
Because I am running my database locally on my machine, I will be using jdbc:mysql://localhost:3306/nintendo as my url. However, if you have a database setup on another server (maybe you have something running on an Amazon ec2 instance) you will have to change this url accordingly.
Creating our First Entity Java Class
Now that we have configured our database within our application, our goal is to create Java objects that we want to represent the tables we wish to create within our database. We’ll start with a very basic example.
First we’ll create a new package within our tutorial.springsetup package called entity and this is where we will keep all of the classes that are meant to represent database tables.
The first table that I want to make will represent a nintendo game. With that in mind, it will store basic information such as the title of a game, a description, and the date that it had been released.
Right click on your entity package and select New > Other
Select Class
Similar to the main class we had created at the beginning of this tutorial, give your class a name. I’ve called mine Game
Your project directory might now look something like…
With our new Game class created we can start writing code that will represent the datatypes of the columns we wish to have in our game table.
package tutorial.springsetup.entity;
import java.sql.Date;
import javax.persistence.Column;
import javax.persistence.Entity;
import javax.persistence.GeneratedValue;
import javax.persistence.GenerationType;
import javax.persistence.Id;
import javax.persistence.Table;
@Entity
@Table(name = "game") // The name of the table that will be mapped to our database
public class Game {
@Id // This will represent our primary key.
@GeneratedValue(strategy = GenerationType.AUTO) // Auto generate an id.
private Long id;
// The title of a game
@Column(name = "title")
private String title;
// A description of the game
@Column(name = "description")
private String description;
// Release date of the game
@Column(name = "release_date")
private Date releaseDate;
public Game(){}
public Long getId() {
return id;
}
publicvoid setId(Long id) {
this.id = id;
}
public String getTitle() {
return title;
}
publicvoid setTitle(String title) {
this.title = title;
}
public String getDescription() {
return description;
}
publicvoid setDescription(String description) {
this.description = description;
}
public Date getReleaseDate() {
return releaseDate;
}
publicvoid setReleaseDate(Date releaseDate) {
this.releaseDate = releaseDate;
}
}
Now that we have our first table setup and written as a Java object, we’re ready to run our application for the first time. By annotating the Game class with @Entity and @Table when we run our application, these components will be scanned and mapped into our relational database.
Running our Application for the First Time
This is where the exciting stuff happens. We’ll run our application in Eclipse and watch our Game table magically appear in our database.
Right click on your main application class (App.java)
Select Run As > Java Application
This will run our application and map our Game.java class into our MySQL database. If you don’t have an errors, your log file might look something like…
Which lets us know that our application has successfully started and is running locally on port 8080.
Double Check that our Game Table was Created
Similar to before, open up Terminal and type mysql -u root -p and enter in your password. To switch to use my nintendo database, I will typeUSE nintendo;and to view the tables of my database I will typeSHOW tables; which confirms that my game table was created after running my application in Eclipse. If I want to check that my columns are appearing as expected, I can typeSHOW COLUMNS from game; where I can see that the objects in my Game.java class have successfully mapped into my relational database.
Awesome! We have now successfully configured our application to communicate and map objects created in Java as tables into our database.
In the next tutorial I will show you how to perform queries in our Spring Boot application to run against our local (nintendo) database. I will show you how you can store the results of these queries as Java objects so that we can perform basic CRUD operations.
Have any questions, comments, suggestions? Having issues getting your project setup? Leave a comment and I’ll be happy to get back to you.
Otherwise, if you prefer a written format keep on scrolling!
This tutorial is for those who want to setup Spring Boot and Hibernate in the Eclipse IDE. Ultimately, this will be the framework we will use to develop REST API’s. You can use any editor of your choice, but to make things easier (and free) I will be using Eclipse Java EE IDE for Web Developers, Version: Mars Release (4.5.0) which can be installed at http://www.eclipse.org/downloads/packages/eclipse-ide-java-ee-developers/marsr and the download links are on located on the right panel.
If you really don’t feel like suffering through this tutorial, I’ll put a link to the source code on github at the bottom of this page for you to import into your IDE of choice.
Creating Your First Project
Once you have installed and opened up your Eclipse IDE, start by creating a new Maven project. To do so, navigate to File > New > Project where a new project select wizard will pop up.
Find the Maven directory and select “Maven Project” as follows.
For this tutorial, we’ll just start up with a simple project. Tick the Create a simple project (skip archetype selection) and hit next.
Enter in a Group Id which is used to uniquely identify your project across all projects. I was creative and named mine tutorial but you can come up with something more interesting if you’d like.
Enter in an Artifact Id, I’ve called mine springsetup – this will be the name of your jar or war file without the version appended.
For this tutorial, I’m going to use war packaging which contains jsp, HTML, javascript and other files necessary for the development of web applications.
Your screen might look something like…
Once you’re happy with your Group Id and Artifact Id, hit Finish.
Super, so you have created your first Maven project and now you’re wondering where the heck Spring Boot comes in. You’ll notice a project directory has been created in your workspace and it might look something like this…
Select the pom.xml file I have highlighted above. In short, POM stands for “Project Object Model” and it is the file that contains all of the necessary information about the project and it is where we will be managing the projects dependencies. Maven will download and link the dependencies listed during compilation alongside other goals that require them. So it’s kind of like magic.
Okay who cares, back to setting up our environment. When you first open your pom.xml file you’ll notice that there are only a few lines. I’ve added in a few more to setup Spring Boot and Hibernate and I’ve created a gist where you can view these changes here. Copy and paste these changes into your pom file. Remember, if you have used a Group Id and Artifact Id that is different from the one I am using, you will only need to copy and paste everything below the <packaging>war</packaging> tag into your file.
Overview of what we have completed
So far we have created our first Maven project and added in the required dependencies (previous step) to begin utilizing Spring Boot and Hibernate. Awesome. We’re ready to start creating some functionality in our project and in the next tutorial I’ll be showing you how to configure your database (the one we created here) within our brand new project so they can begin communicating with one another.
For those of you who just want to import the source code from this tutorial, you can find it at https://github.com/dnaismyth/springbootskeleton and from here you can clone/download the project and import it into your preferred IDE.
Have any questions, comments, suggestions? Having issues getting your project setup? Leave a comment and I’ll be happy to get back to you.
Before we get started with some interesting things, first you’re going to want to set up your database. For this tutorial we will be working with MySQL, but feel free to use whatever you’re most comfortable with. If you already have your database set up, and you are only interested in Spring + Hibernate you can just skip this step completely. My examples will be run on a mac, but if you have any questions on setting up in a different environment feel free to ask.
Once that has finished downloading, you’ll be prompted through a general setup in which you’ll probably just want to click next until you see the “install” button.
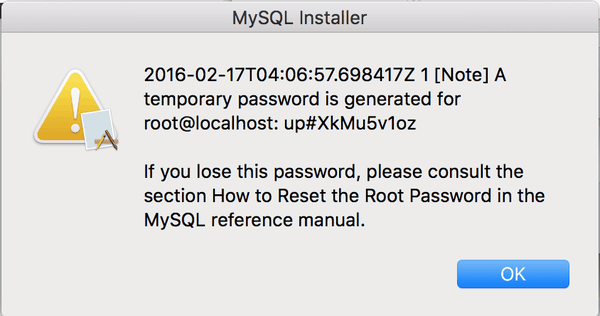
Alright, so you’ve hit “install” and now you get a popup which provides you with your temporary root credentials.
You might not have any idea what that means, but that’s okay just remember to keep this information saved or your next google search might be something like “how do i change my mysql password?? grrr” because if you’re anything like me, you sure as hell won’t be going to the MySQL reference manual.
Creating Your First Database
Great, so you have now successfully installed MySQL and have saved your temporary credentials. Open up terminal and we’ll get started on creating our first database.
Type mysql -u root -p and when it prompts you to “Enter Password” type in the temporary one you were given earlier. Once you’ve entered this password, you’ll likely be asked to change it. Upon doing so, you should now be able to make use of the mysql command line tool where we can start entering in our SQL statements. Your screen might look something like this…
Potential Errors – Skip this chunk if you are able to successfully access the mysql command line tool.
'mysql' is not recognized as an internal or external command, operable program or batch file
If you are receiving the above error after attempting to access mysql via Terminal, there is an issue with your PATH variable. To fix this, try runningexport PATH=${PATH}:/usr/local/mysql/bin in Terminal and then repeating the previous step.
Let’s create our first database. I want to name my database “nintendo” for the purpose of this tutorial, so I’m going to performCREATE DATABASE nintendo;
You can name your database whatever you want. After doing so, your terminal window might kind of look like this…
This is good. If we want to start using this database and adding tables to it through terminal, we can executeUSE nintendo;which will mean that we have switched to use our newly created database and all of our SQL statements we would like to execute in this session will run against this database. If we want to see the tables within our new database, we can typeSHOW tables;which (at this point) will show an empty result as we have yet to create any.
If you’ve made it this far, I hope you have been able to successfully install MySQL and create your first database. For the purpose of this tutorial, we will not be creating any tables through terminal. Rather, we will be setting up a Spring + Hibernate environment where I will show you how you can take an object-oriented domain written in Java and map it to a relational database. Are you wondering what the hell this even means? If so, I’ll walk you through it in the upcoming tutorials.
Have any questions, comments, suggestions? Or maybe you’re just stumbling across a few issues trying to get your database set up (I know, it’s frustrating). Leave a comment and I’ll be happy to get back to you.