
Prefer to watch a video?
- Configuring your database to work with Spring Boot on youtube right here.
- Mapping Java classes to the database right here.
Otherwise, if you prefer written format… keep on scrolling!
Last tutorial we looked at setting up our Spring Boot and Hibernate environment by adding dependencies to our pom.xml file. If you have yet to follow that tutorial, you can find it here or you can download and import the source code from https://github.com/dnaismyth/springbootskeleton which contains our basic project setup.
In this tutorial, we will be working through to set up communication between our Spring Boot project and our database. This is where Hibernate comes into play and we will use it to map a simple object-oriented domain written in Java to a relational database.
Setting up Our Main Application Class
In order to run our project, we need to set up our main class which is the single entry point of our application and is responsible for invoking all subsequent methods. Don’t worry, Spring Boot makes this pretty easy.
Inside of my src/main/java directory, I’ve created another package called tutorial.springsetup which is our default package.
- Right click on your src/main/java directory
- Select New > Other
- Type “package” to filter and then select next
- Enter a name for your package and select
Now that we have our default package, right click on it and by following the similar steps as above we can create our main application class as follows…
- Right click on the package you have just created
- Select New > Other
- Select Class and click next
You’ll be taken to a screen that looks similar to this…
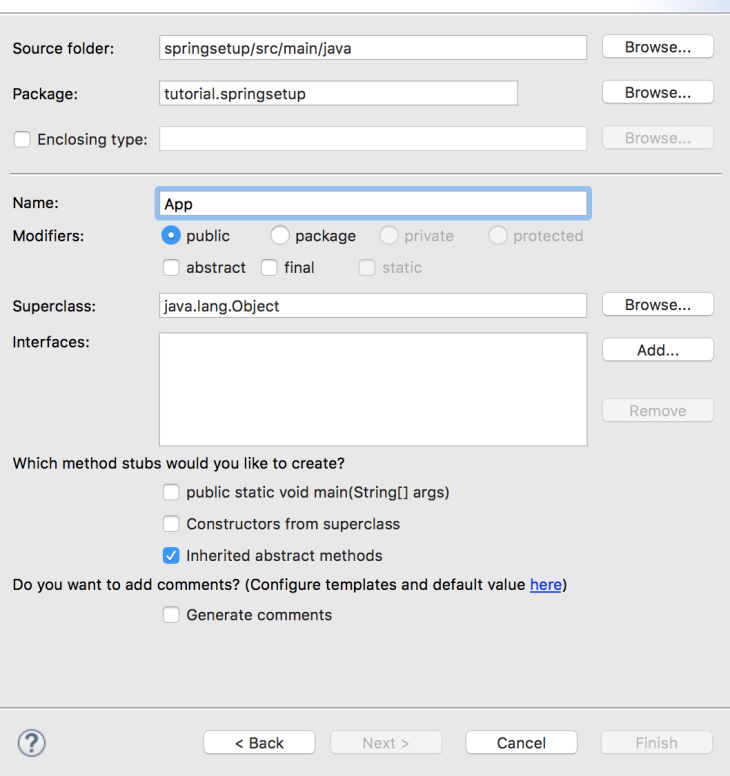
Give your class a name. I’ve called mine App but if you prefer to use something different feel free to do so. Select Finish to create your new class. Your directory should now look something like…
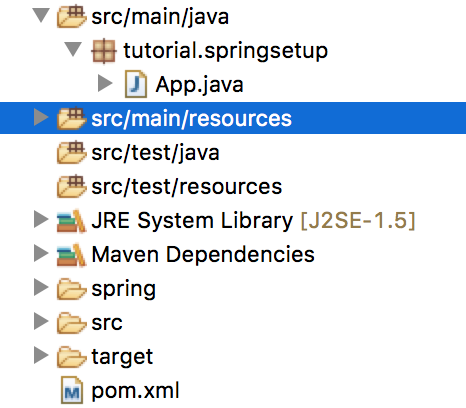
Remember before when I said that Spring Boot makes this easy? With your new class created, add in the following code:
import org.springframework.boot.SpringApplication;
import org.springframework.boot.autoconfigure.SpringBootApplication;
import org.springframework.context.annotation.ComponentScan;

@ComponentScan
@SpringBootApplication
public class App {
    public static void main(String[] args) {
        SpringApplication.run(App.class, args);
    }
}
Great, we now have our main application class created.
Configuring our Application Properties to Communicate with our Database
In order to hook up our database with our project, we need to add in a few properties that provide the details of the database we had set up earlier.
Find src/main/resources in your project directory and do the following…
- Right click src/main/resources
- Select New > Other and type “file” to filter

- Click Next and in the field where it says “File Name” type application.properties
Note that in this case, your file must be named application.properties
Your project directory should now look something like…

Open up your new application.properties file and add in the following properties
# If you didn't name your database "nintendo" use the name of your
# database that you had created in our first tutorial.
spring.datasource.url = jdbc:mysql://localhost:3306/nintendo
# Use your MySQL username
spring.datasource.username = root
# User your MySQL password
spring.datasource.password = admin

spring.jpa.properties.hibernate.dialect = org.hibernate.dialect.MySQL5Dialect
spring.datasource.driver-class-name = com.mysql.jdbc.Driver
spring.jpa.hibernate.ddl-auto = update
spring.datasource.initialize = false

# Port we will run our application on
server.port=8080
Because I am running my database locally on my machine, I will be using jdbc:mysql://localhost:3306/nintendo as my url. However, if you have a database setup on another server (maybe you have something running on an Amazon ec2 instance) you will have to change this url accordingly.
Creating our First Entity Java Class
Now that we have configured our database within our application, our goal is to create Java objects that we want to represent the tables we wish to create within our database. We’ll start with a very basic example.
First we’ll create a new package within our tutorial.springsetup package called entity and this is where we will keep all of the classes that are meant to represent database tables.
The first table that I want to make will represent a nintendo game. With that in mind, it will store basic information such as the title of a game, a description, and the date that it had been released.
- Right click on your entity package and select New > Other
- Select Class
- Similar to the main class we had created at the beginning of this tutorial, give your class a name. I’ve called mine Game
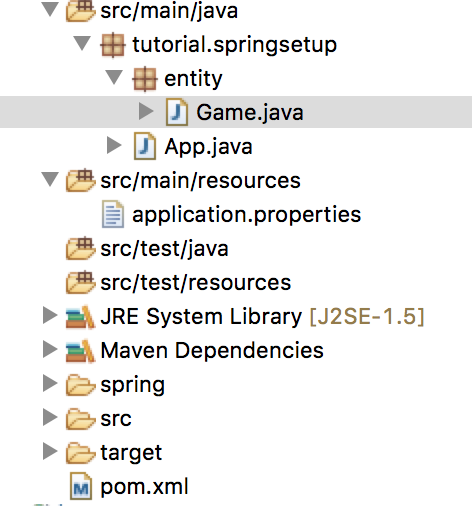
Your project directory might now look something like…
With our new Game class created we can start writing code that will represent the datatypes of the columns we wish to have in our game table.
package tutorial.springsetup.entity;

import java.sql.Date;
import javax.persistence.Column;
import javax.persistence.Entity;
import javax.persistence.GeneratedValue;
import javax.persistence.GenerationType;
import javax.persistence.Id;
import javax.persistence.Table;

@Entity
@Table(name = "game") // The name of the table that will be mapped to our database
public class Game {

    @Id // This will represent our primary key.
    @GeneratedValue(strategy = GenerationType.AUTO) // Auto generate an id.
    private Long id;

    // The title of a game
    @Column(name = "title")
    private String title;

    // A description of the game
    @Column(name = "description")
    private String description;

    // Release date of the game
    @Column(name = "release_date")
    private Date releaseDate;

    public Game(){}

    public Long getId() {
        return id;
    }

    public void setId(Long id) {
        this.id = id;
    }

    public String getTitle() {
        return title;
    }

    public void setTitle(String title) {
        this.title = title;
    }

    public String getDescription() {
        return description;
    }

    public void setDescription(String description) {
        this.description = description;
    }

    public Date getReleaseDate() {
        return releaseDate;
    }

    public void setReleaseDate(Date releaseDate) {
        this.releaseDate = releaseDate;
    }
}
Now that we have our first table setup and written as a Java object, we’re ready to run our application for the first time. By annotating the Game class with @Entity and @Table when we run our application, these components will be scanned and mapped into our relational database.
Running our Application for the First Time
This is where the exciting stuff happens. We’ll run our application in Eclipse and watch our Game table magically appear in our database.
- Right click on your main application class (App.java)
- Select Run As > Java Application
This will run our application and map our Game.java class into our MySQL database. If you don’t have an errors, your log file might look something like…

Which lets us know that our application has successfully started and is running locally on port 8080.
Double Check that our Game Table was Created
Similar to before, open up Terminal and type mysql -u root -p and enter in your password. To switch to use my nintendo database, I will type USE nintendo; and to view the tables of my database I will type SHOW tables; which confirms that my game table was created after running my application in Eclipse. If I want to check that my columns are appearing as expected, I can type SHOW COLUMNS from game; where I can see that the objects in my Game.java class have successfully mapped into my relational database.

Awesome! We have now successfully configured our application to communicate and map objects created in Java as tables into our database.
In the next tutorial I will show you how to perform queries in our Spring Boot application to run against our local (nintendo) database. I will show you how you can store the results of these queries as Java objects so that we can perform basic CRUD operations.
Have any questions, comments, suggestions? Having issues getting your project setup? Leave a comment and I’ll be happy to get back to you.
